Breaking Free from Google: A Self-Hosting Guide with Coolify
Breaking Free from Google: A Self-Hosting Guide with Coolify
In today's digital landscape, many of us rely heavily on Google's suite of services for everything from email to file storage. While these services are convenient, they come with privacy concerns and a lack of control over your own data. This guide will walk you through setting up your own self-hosted alternatives using Coolify as the central management platform.
Why Self-Host?
Self-hosting gives you:
- Complete control over your data
- Enhanced privacy without third-party data collection
- Customization options not available with commercial services
- Independence from corporate decisions and pricing changes
- Learning opportunities about infrastructure and deployment
What We'll Cover
In this guide, we'll set up:
- Coolify - A self-hosted Heroku/Netlify alternative for managing applications
- Nextcloud - A Google Drive/Photos/Calendar alternative
- Stalwart - A robust email server replacing Gmail
- n8n - An automation tool similar to Google Apps Script/Zapier
Prerequisites
- A VPS or home server running Linux
- A domain name you control
- Basic familiarity with the command line
- Cloudflare account (for DNS management and proxy)
Setting Up Coolify
Coolify will be our central management platform for deploying and managing all our services.
One-Command Installation
IMPORTANT NOTE: Coolify currently are so buggy without root access. Many new Linux Distro focus to outside users from using root account for already prepared non-root aacount. Make sure to use root account for installation.
Coolify offers a simple one-command installation. SSH into your server and run:
curl -fsSL https://cdn.coollabs.io/coolify/install.sh | sudo bash
This script will install Docker and set up Coolify with all necessary dependencies. After installation, you'll be provided with a URL to access the Coolify dashboard.
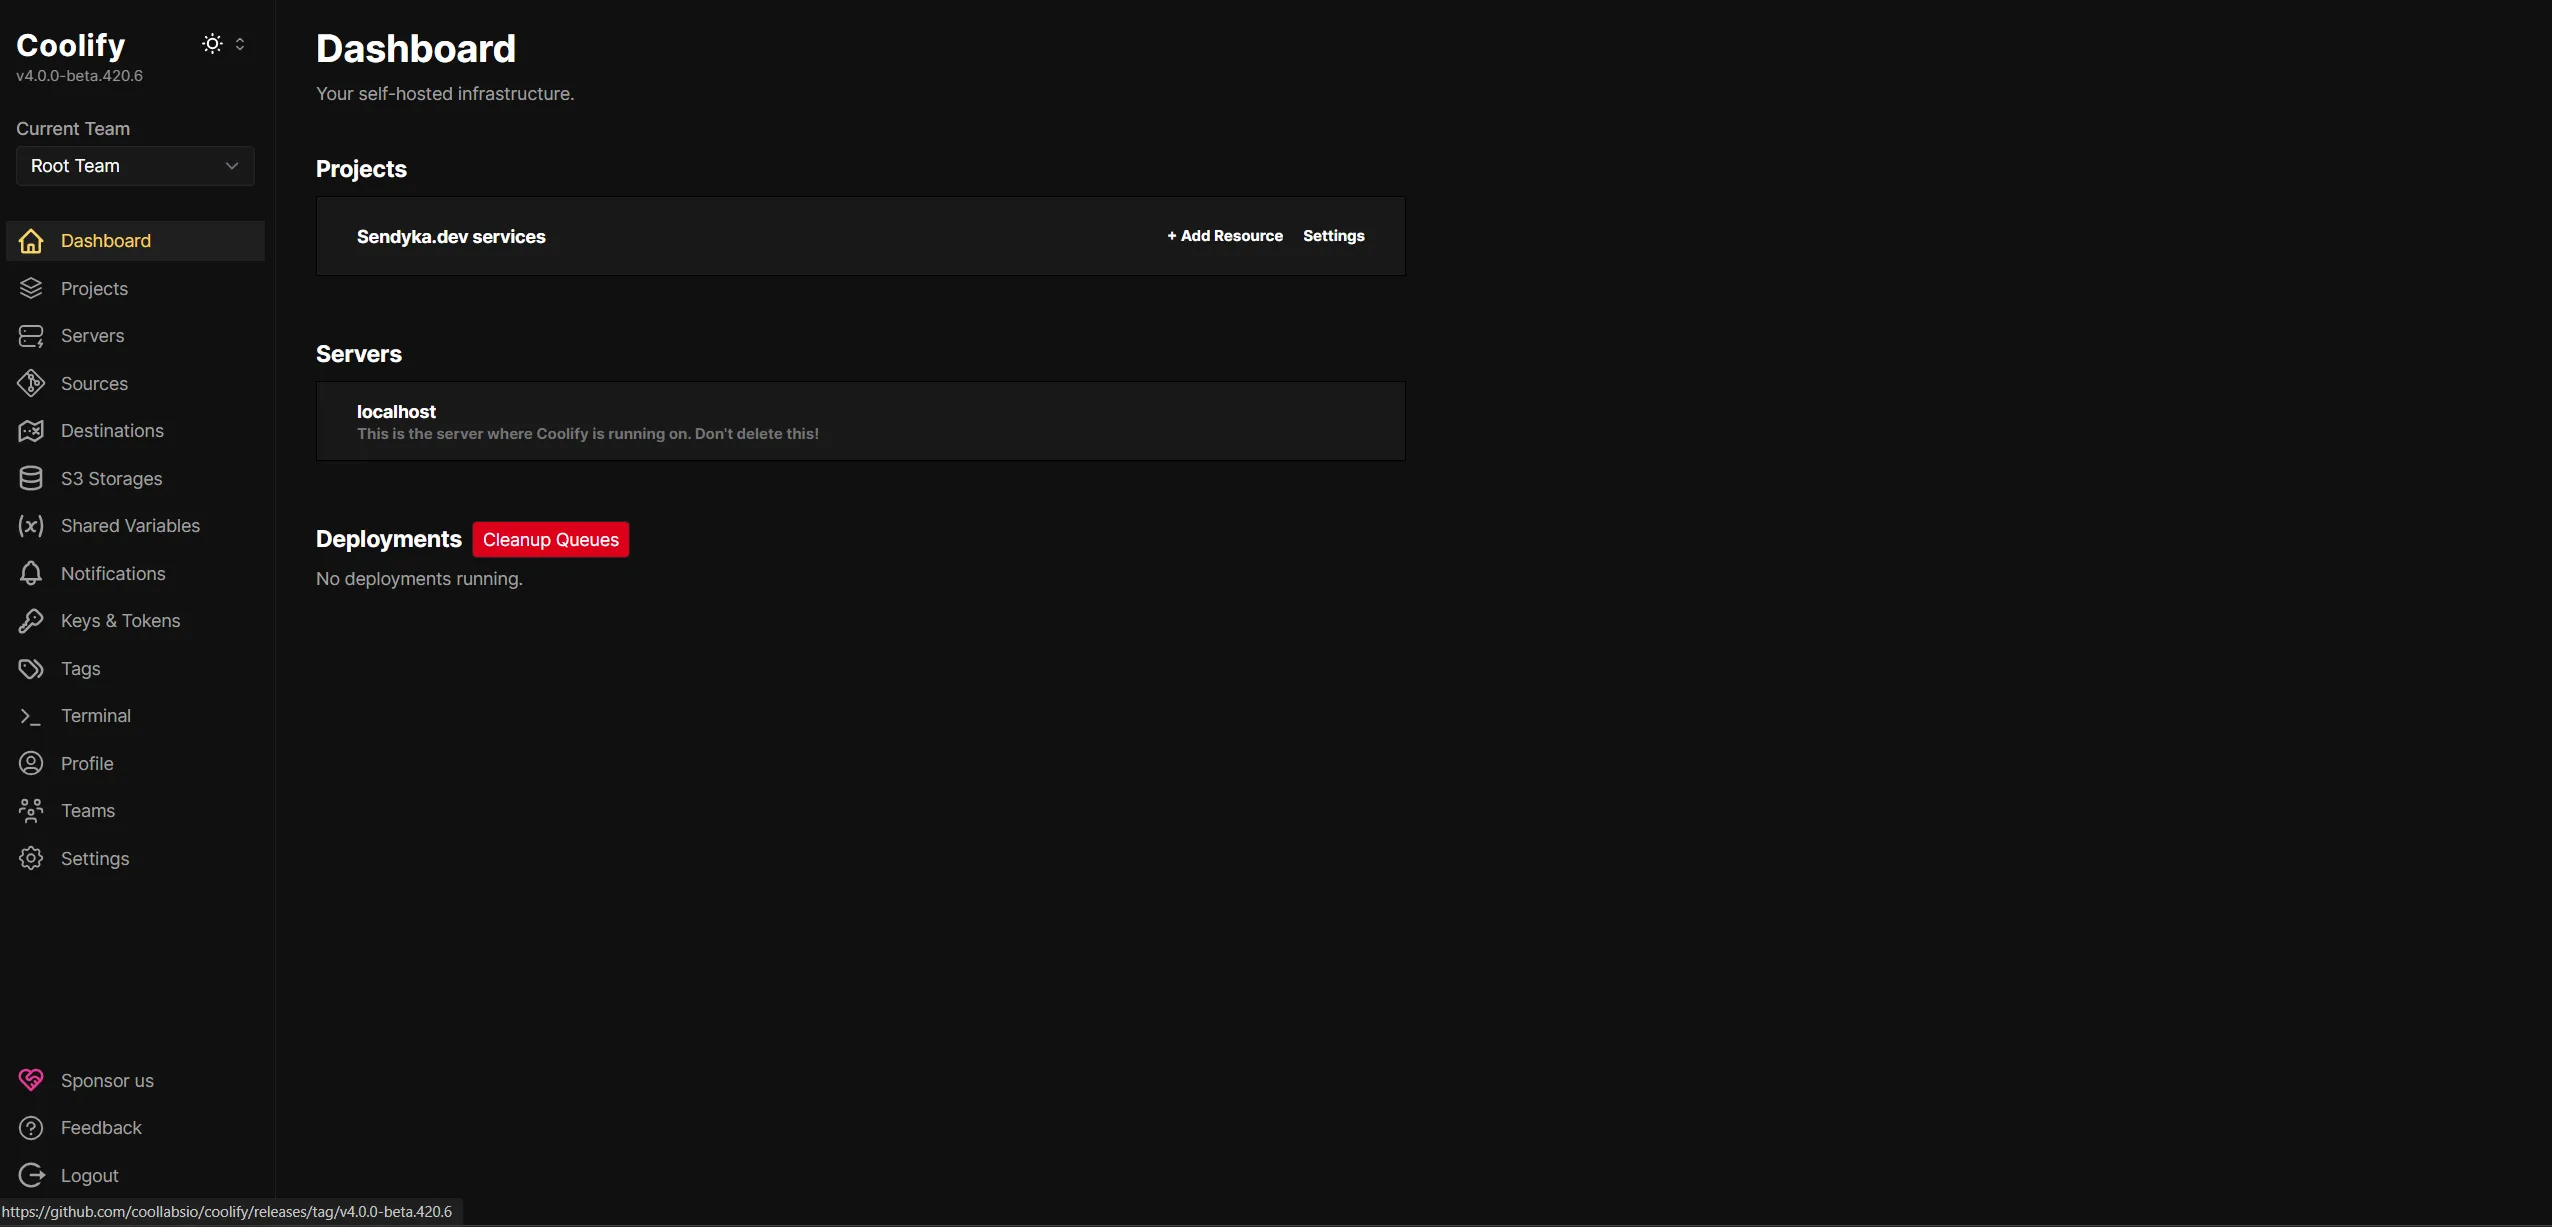
Initial Configuration
Once installed, you'll see the Coolify dashboard:
From here, you can:
- Create a new team or use the default "Root Team"
- Set up your first project (we'll name ours "SelfHosted.domain services")
- Configure your server settings
Setting Up Traefik Proxy with Cloudflare Integration
Before deploying our services, we need to configure Traefik as our reverse proxy to handle domain routing and SSL certificates.
Configuring Traefik in Coolify
- Navigate to the "Server" section in Coolify
- Select the "Proxy" tab
- You'll see the Traefik configuration screen:
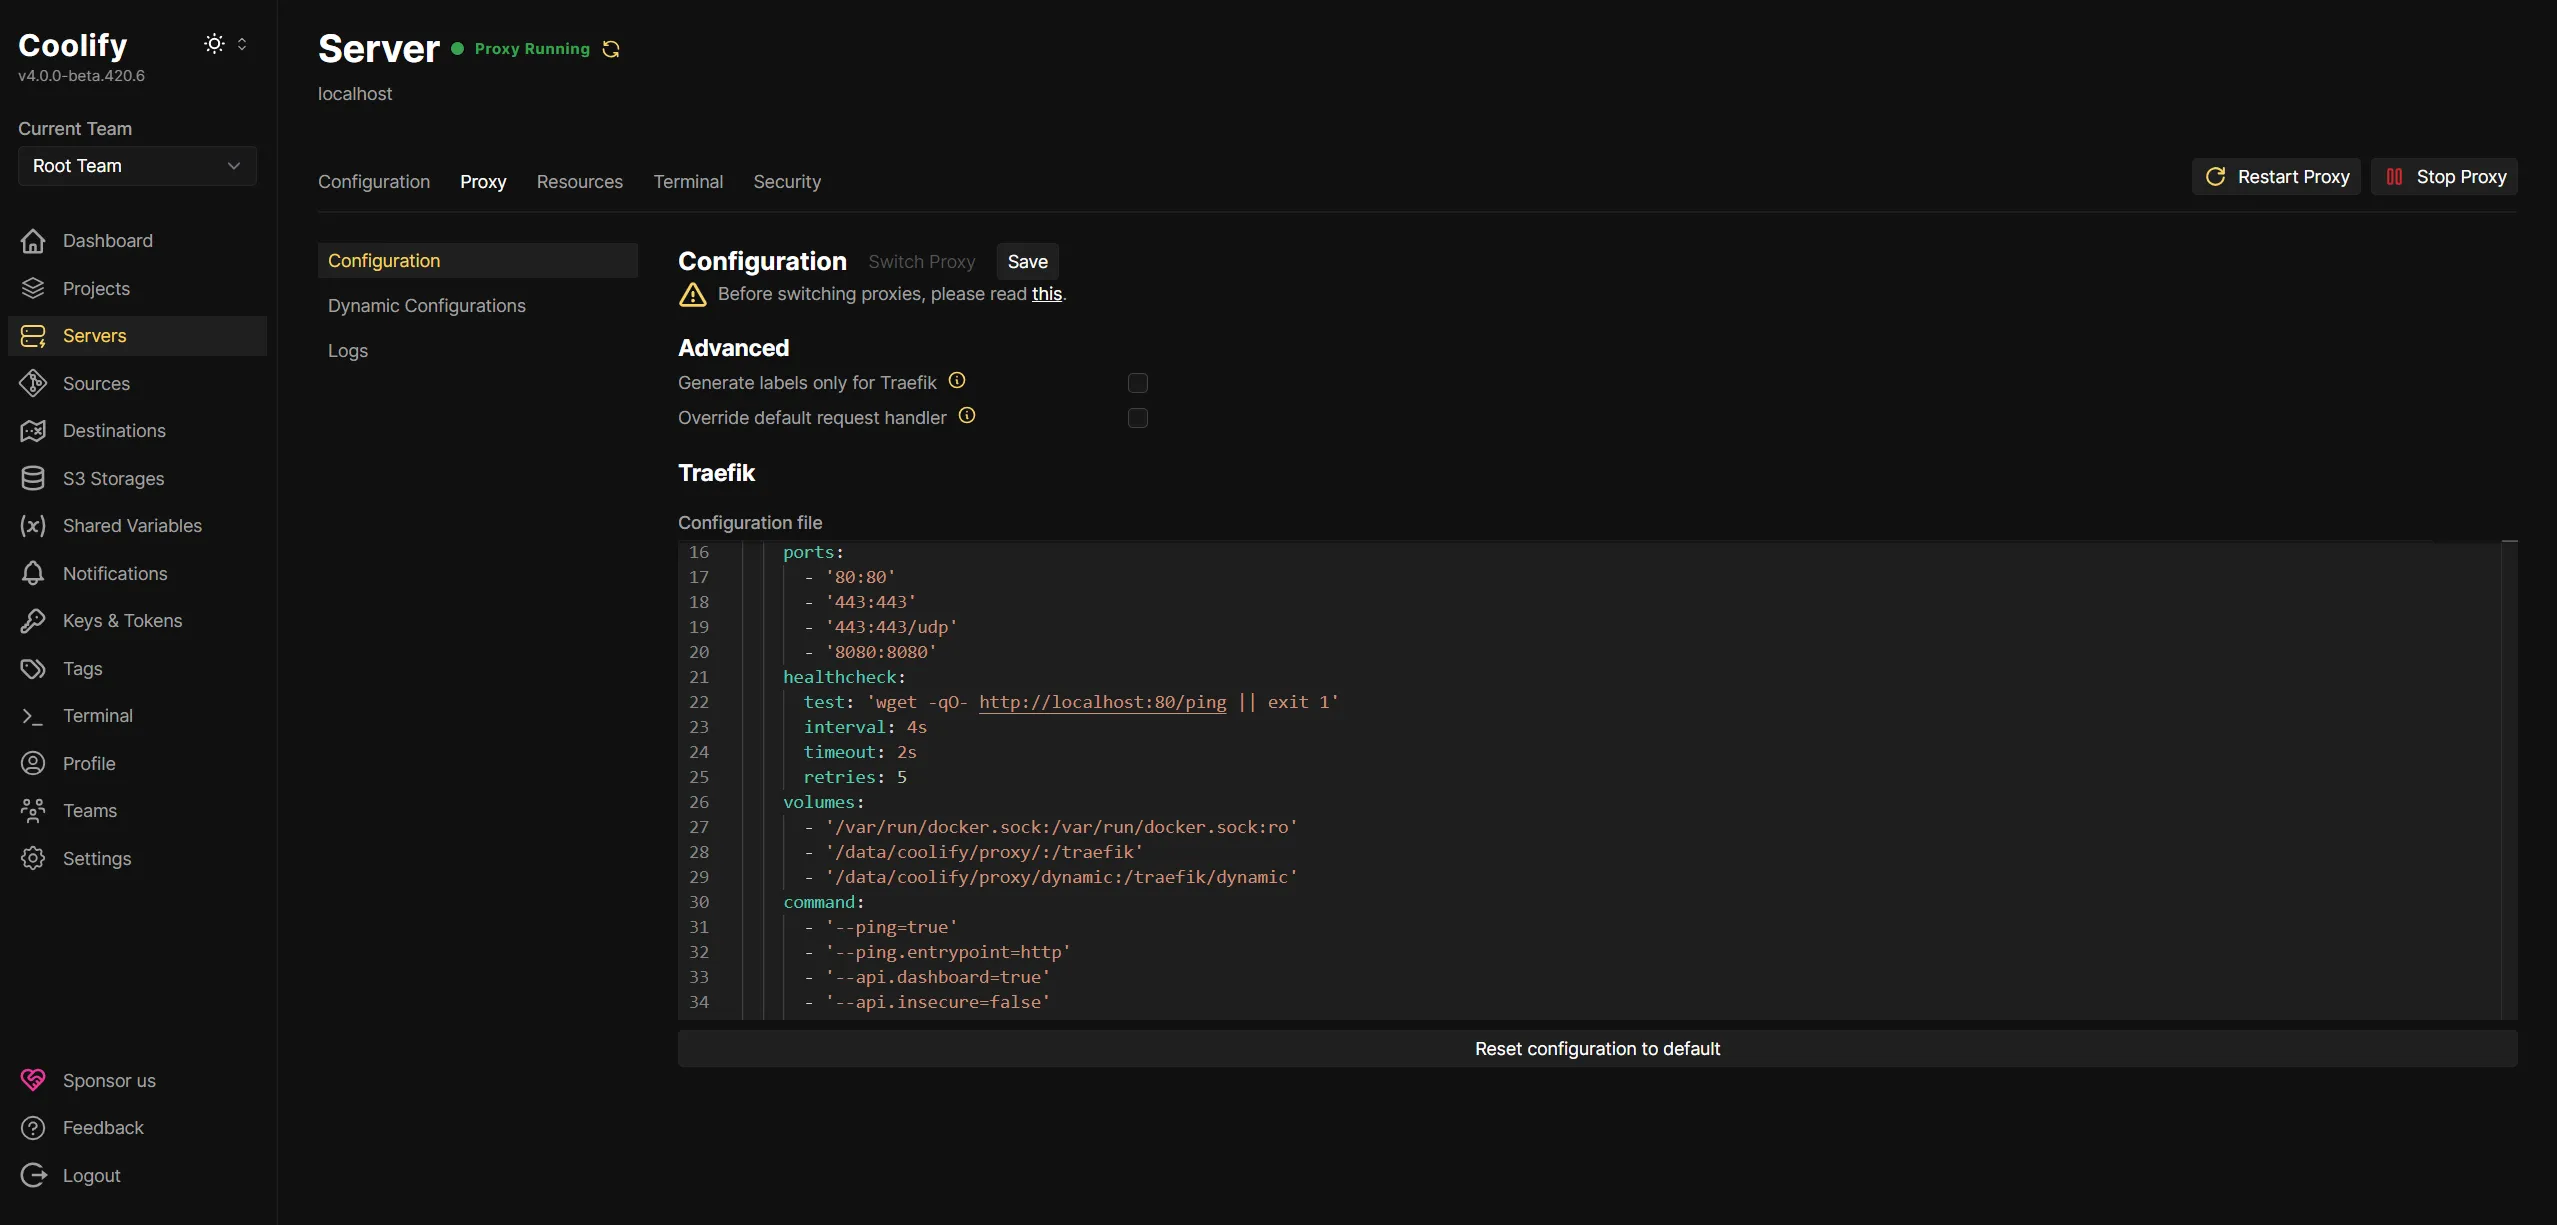
- In the configuration file, add your Cloudflare API credentials:
IMPORTANT NOTE: I've tested setup with Global API Key from CF and to be honest, that's completetly mess my SSL domain setup (ex. my main domain properly recognise SSL but sub-domain via traefik not.), so that preferably generate DNS API key with access minimally to your DNS domain zone for traefik purposes.
name: coolify-proxy
networks:
  coolify:
    external: true
services:
  traefik:
    container_name: coolify-proxy
    image: 'traefik:v3.1'
    restart: unless-stopped
    environment:
      - CF_DNS_API_TOKEN=your-cloudflare-dns-api-key
    extra_hosts:
      - 'host.docker.internal:host-gateway'
    networks:
      - coolify
    ports:
      - '80:80'
      - '443:443'
      - '443:443/udp'
      - '8080:8080'
    healthcheck:
      test: 'wget -qO- http://localhost:80/ping || exit 1'
      interval: 4s
      timeout: 2s
      retries: 5
    volumes:
      - '/var/run/docker.sock:/var/run/docker.sock:ro'
      - '/data/coolify/proxy/:/traefik'
      - '/data/coolify/proxy/dynamic:/traefik/dynamic'
    command:
      - '--ping=true'
      - '--ping.entrypoint=http'
      - '--api.dashboard=true'
      - '--api.insecure=false'
      - '--entrypoints.http.address=:80'
      - '--entrypoints.https.address=:443'
      - '--entrypoints.http.http.encodequerysemicolons=true'
      - '--entryPoints.http.http2.maxConcurrentStreams=50'
      - '--entrypoints.https.http.encodequerysemicolons=true'
      - '--entryPoints.https.http2.maxConcurrentStreams=50'
      - '--entrypoints.https.http3'
      - '--providers.docker.exposedbydefault=false'
      - '--providers.file.directory=/traefik/dynamic/'
      - '--providers.file.watch=true'
      - '--certificatesresolvers.letsencrypt.acme.dnschallenge.provider=cloudflare'
      - '--certificatesresolvers.letsencrypt.acme.dnschallenge.delaybeforecheck=0'
      - '--certificatesresolvers.letsencrypt.acme.storage=/traefik/acme.json'
      - '--providers.docker=true'
    labels:
      - traefik.enable=true
      - traefik.http.routers.traefik.entrypoints=http
      - traefik.http.routers.traefik.middlewares=redirect-to-https@file
      - traefik.http.routers.traefik.service=api@internal
      - traefik.http.routers.traefik.tls.certresolver=letsencrypt
      - traefik.http.routers.traefik.tls.domains[0].main=your.domain
      - traefik.http.routers.traefik.tls.domains[0].sans=*.your.domain
      - traefik.http.services.traefik.loadbalancer.server.port=8080
      - traefik.http.middlewares.redirect-to-https.redirectscheme.scheme=https
      - traefik.http.middlewares.gzip.compress=true
      - coolify.managed=true
      - coolify.proxy=true
- Save the configuration and restart the proxy
Deploying Nextcloud (Google Drive Alternative)
Nextcloud provides file storage, calendar, contacts, and much more.
Creating the Docker Compose File
- In Coolify, go to "Resources" and click "New"
- Select "Service" and choose "Docker Compose"
- Name your service "nextcloud"
- Paste the following Docker Compose configuration:
version: '3.8'
services:
  nextcloud:
    image: 'lscr.io/linuxserver/nextcloud:latest'
    container_name: nextcloud
    environment:
      - PUID=1000
      - PGID=1000
      - TZ=Etc/UTC
      - REDIS_HOST=redis
      - POSTGRES_HOST=db
      - POSTGRES_DB=${POSTGRES_DB:-nextcloud-db}
      - POSTGRES_USER=${POSTGRES_USER:-nextcloud-user}
      - POSTGRES_PASSWORD=${POSTGRES_PASSWORD:-nextcloud-password}
    volumes:
      - 'config:/config'
      - 'data:/data'
    ports:
      - '8443:443'
    depends_on:
      - db
      - redis
    restart: unless-stopped
    labels:
      - "traefik.enable=true"
      - "traefik.http.routers.nextcloud.rule=Host(`nextcloud.yourdomain.com`)"
      - "traefik.http.routers.nextcloud.entrypoints=websecure"
      - "traefik.http.routers.nextcloud.tls.certresolver=cloudflare"
    networks:
      - nextcloud_network
  db:
    image: 'postgres:14-alpine'
    container_name: nextcloud-db
    environment:
      - POSTGRES_USER=$POSTGRES_USER
      - POSTGRES_PASSWORD=$POSTGRES_PASSWORD
      - POSTGRES_DB=$POSTGRES_DB
    volumes:
      - './postgres:/var/lib/postgresql/data'
    restart: unless-stopped
    networks:
      - nextcloud_network
  redis:
    image: 'redis:latest'
    container_name: redis
    restart: unless-stopped
    networks:
      - nextcloud_network
networks:
  nextcloud_network:
    driver: bridge
- Replace
yourdomain.comwith your actual domain - Update the passwords to secure values
- Deploy the service
Deploying Stalwart Mail Server (Gmail Alternative)
Stalwart is a modern, fast, and secure mail server.
Setting Up Stalwart
- In Coolify, create a new service named "stalwart"
- Use the following Docker Compose configuration:
version: '3.8'
services:
  stalwart-mail:
    image: 'stalwartlabs/stalwart:latest'
    container_name: stalwart-mail
    networks:
      - coolify
    ports:
      - '25:25'
      - '587:587'
      - '465:465'
      - '143:143'
      - '993:993'
      - '4190:4190'
      - '110:110'
      - '995:995'
    volumes:
      - '/var/lib/stalwart-mail:/opt/stalwart-mail'
      - '/etc/localtime:/etc/localtime:ro'
      - '/data/coolify/certs:/data/certs:ro'
    labels:
      - traefik.enable=true
      - 'traefik.http.routers.mailserver.rule=Host(`mail.yourdomain.com`) || Host(`autodiscover.yourdomain.com`) || Host(`autoconfig.yourdomain.com`) || Host(`mta-sts.yourdomain.com`) || Host(`mx.yourdomain.com`) || Host(`smtp.yourdomain.com`) || Host(`pop.yourdomain.com`) || Host(`imap.yourdomain.com`)'
      - traefik.http.routers.mailserver.entrypoints=http
      - traefik.http.routers.mailserver.service=mailserver
      - traefik.http.services.mailserver.loadbalancer.server.port=8080
      - traefik.http.routers.mailserver.tls.certresolver=letsencrypt
      - traefik.http.routers.mailserver.tls=true
      - 'traefik.http.routers.mailserver.tls.domains[0].main=mail.yourdomain.com'
      - 'traefik.http.routers.mailserver.tls.domains[0].sans=autodiscover.yourdomain.com,autoconfig.yourdomain.com,mta-sts.yourdomain.com,mx.yourdomain.com,smtp.yourdomain.com,pop.yourdomain.com,imap.yourdomain.com'
      - 'traefik.tcp.routers.smtp.rule=HostSNI(`*`)'
      - traefik.tcp.routers.smtp.entrypoints=smtp
      - traefik.tcp.routers.smtp.service=smtp
      - traefik.tcp.services.smtp.loadbalancer.server.port=25
      - traefik.tcp.services.smtp.loadbalancer.proxyProtocol.version=2
      - 'traefik.tcp.routers.jmap.rule=HostSNI(`*`)'
      - traefik.tcp.routers.jmap.tls.passthrough=true
      - traefik.tcp.routers.jmap.entrypoints=https
      - traefik.tcp.routers.jmap.service=jmap
      - traefik.tcp.services.jmap.loadbalancer.server.port=443
      - traefik.tcp.services.jmap.loadbalancer.proxyProtocol.version=2
      - 'traefik.tcp.routers.smtps.rule=HostSNI(`*`)'
      - traefik.tcp.routers.smtps.tls.passthrough=true
      - traefik.tcp.routers.smtps.entrypoints=smtps
      - traefik.tcp.routers.smtps.service=smtps
      - traefik.tcp.services.smtps.loadbalancer.server.port=465
      - traefik.tcp.services.smtps.loadbalancer.proxyProtocol.version=2
      - 'traefik.tcp.routers.imaps.rule=HostSNI(`*`)'
      - traefik.tcp.routers.imaps.tls.passthrough=true
      - traefik.tcp.routers.imaps.entrypoints=imaps
      - traefik.tcp.routers.imaps.service=imaps
      - traefik.tcp.services.imaps.loadbalancer.server.port=993
      - traefik.tcp.services.imaps.loadbalancer.proxyProtocol.version=2
    tty: true
    stdin_open: true
    restart: always
volumes:
  data: null
networks:
  coolify:
    external: true

- Replace
yourdomain.comwith your actual domain - Next, continue with generated admin passes to your admin panel and them
Management->Domainsto add your domain to services. - After that, click three bullets next your setupped domain to
View DNS recordsand export or manually add all records to your DNS provider. - At the end of course you can add your mail address in
Accountsand also checkACME providersto add support for CF purposes.
Deploying n8n (Google Apps Script/Zapier Alternative)
n8n is a powerful workflow automation tool.
Setting Up n8n
- Create a new service named "n8n"
- Use the following Docker Compose configuration:
services:
  n8n:
    image: docker.n8n.io/n8nio/n8n
    environment:
      - SERVICE_FQDN_N8N_5678
      - 'N8N_EDITOR_BASE_URL=${SERVICE_FQDN_N8N}'
      - 'WEBHOOK_URL=${SERVICE_FQDN_N8N}'
      - 'N8N_HOST=${SERVICE_URL_N8N}'
      - 'GENERIC_TIMEZONE=${GENERIC_TIMEZONE:-Europe/Berlin}'
      - 'TZ=${TZ:-Europe/Berlin}'
      - DB_TYPE=postgresdb
      - 'DB_POSTGRESDB_DATABASE=${POSTGRES_DB:-n8n}'
      - DB_POSTGRESDB_HOST=postgresql
      - DB_POSTGRESDB_PORT=5432
      - DB_POSTGRESDB_USER=$SERVICE_USER_POSTGRES
      - DB_POSTGRESDB_SCHEMA=public
      - DB_POSTGRESDB_PASSWORD=$SERVICE_PASSWORD_POSTGRES
    volumes:
      - 'n8n-data:/home/node/.n8n'
    depends_on:
      postgresql:
        condition: service_healthy
    healthcheck:
      test:
        - CMD-SHELL
        - 'wget -qO- http://127.0.0.1:5678/'
      interval: 5s
      timeout: 20s
      retries: 10
    labels:
      - "traefik.enable=true"
      - "traefik.http.routers.n8n.rule=Host(`n8n.yourdomain.com`)"
      - "traefik.http.routers.n8n.entrypoints=websecure"
      - "traefik.http.routers.n8n.tls.certresolver=cloudflare"
      - "traefik.http.services.n8n.loadbalancer.server.port=5678"
  postgresql:
    image: 'postgres:16-alpine'
    volumes:
      - 'postgresql-data:/var/lib/postgresql/data'
    environment:
      - POSTGRES_USER=$SERVICE_USER_POSTGRES
      - POSTGRES_PASSWORD=$SERVICE_PASSWORD_POSTGRES
      - 'POSTGRES_DB=${POSTGRES_DB:-n8n}'
    healthcheck:
      test:
        - CMD-SHELL
        - 'pg_isready -U $${POSTGRES_USER} -d $${POSTGRES_DB}'
      interval: 5s
      timeout: 20s
      retries: 10
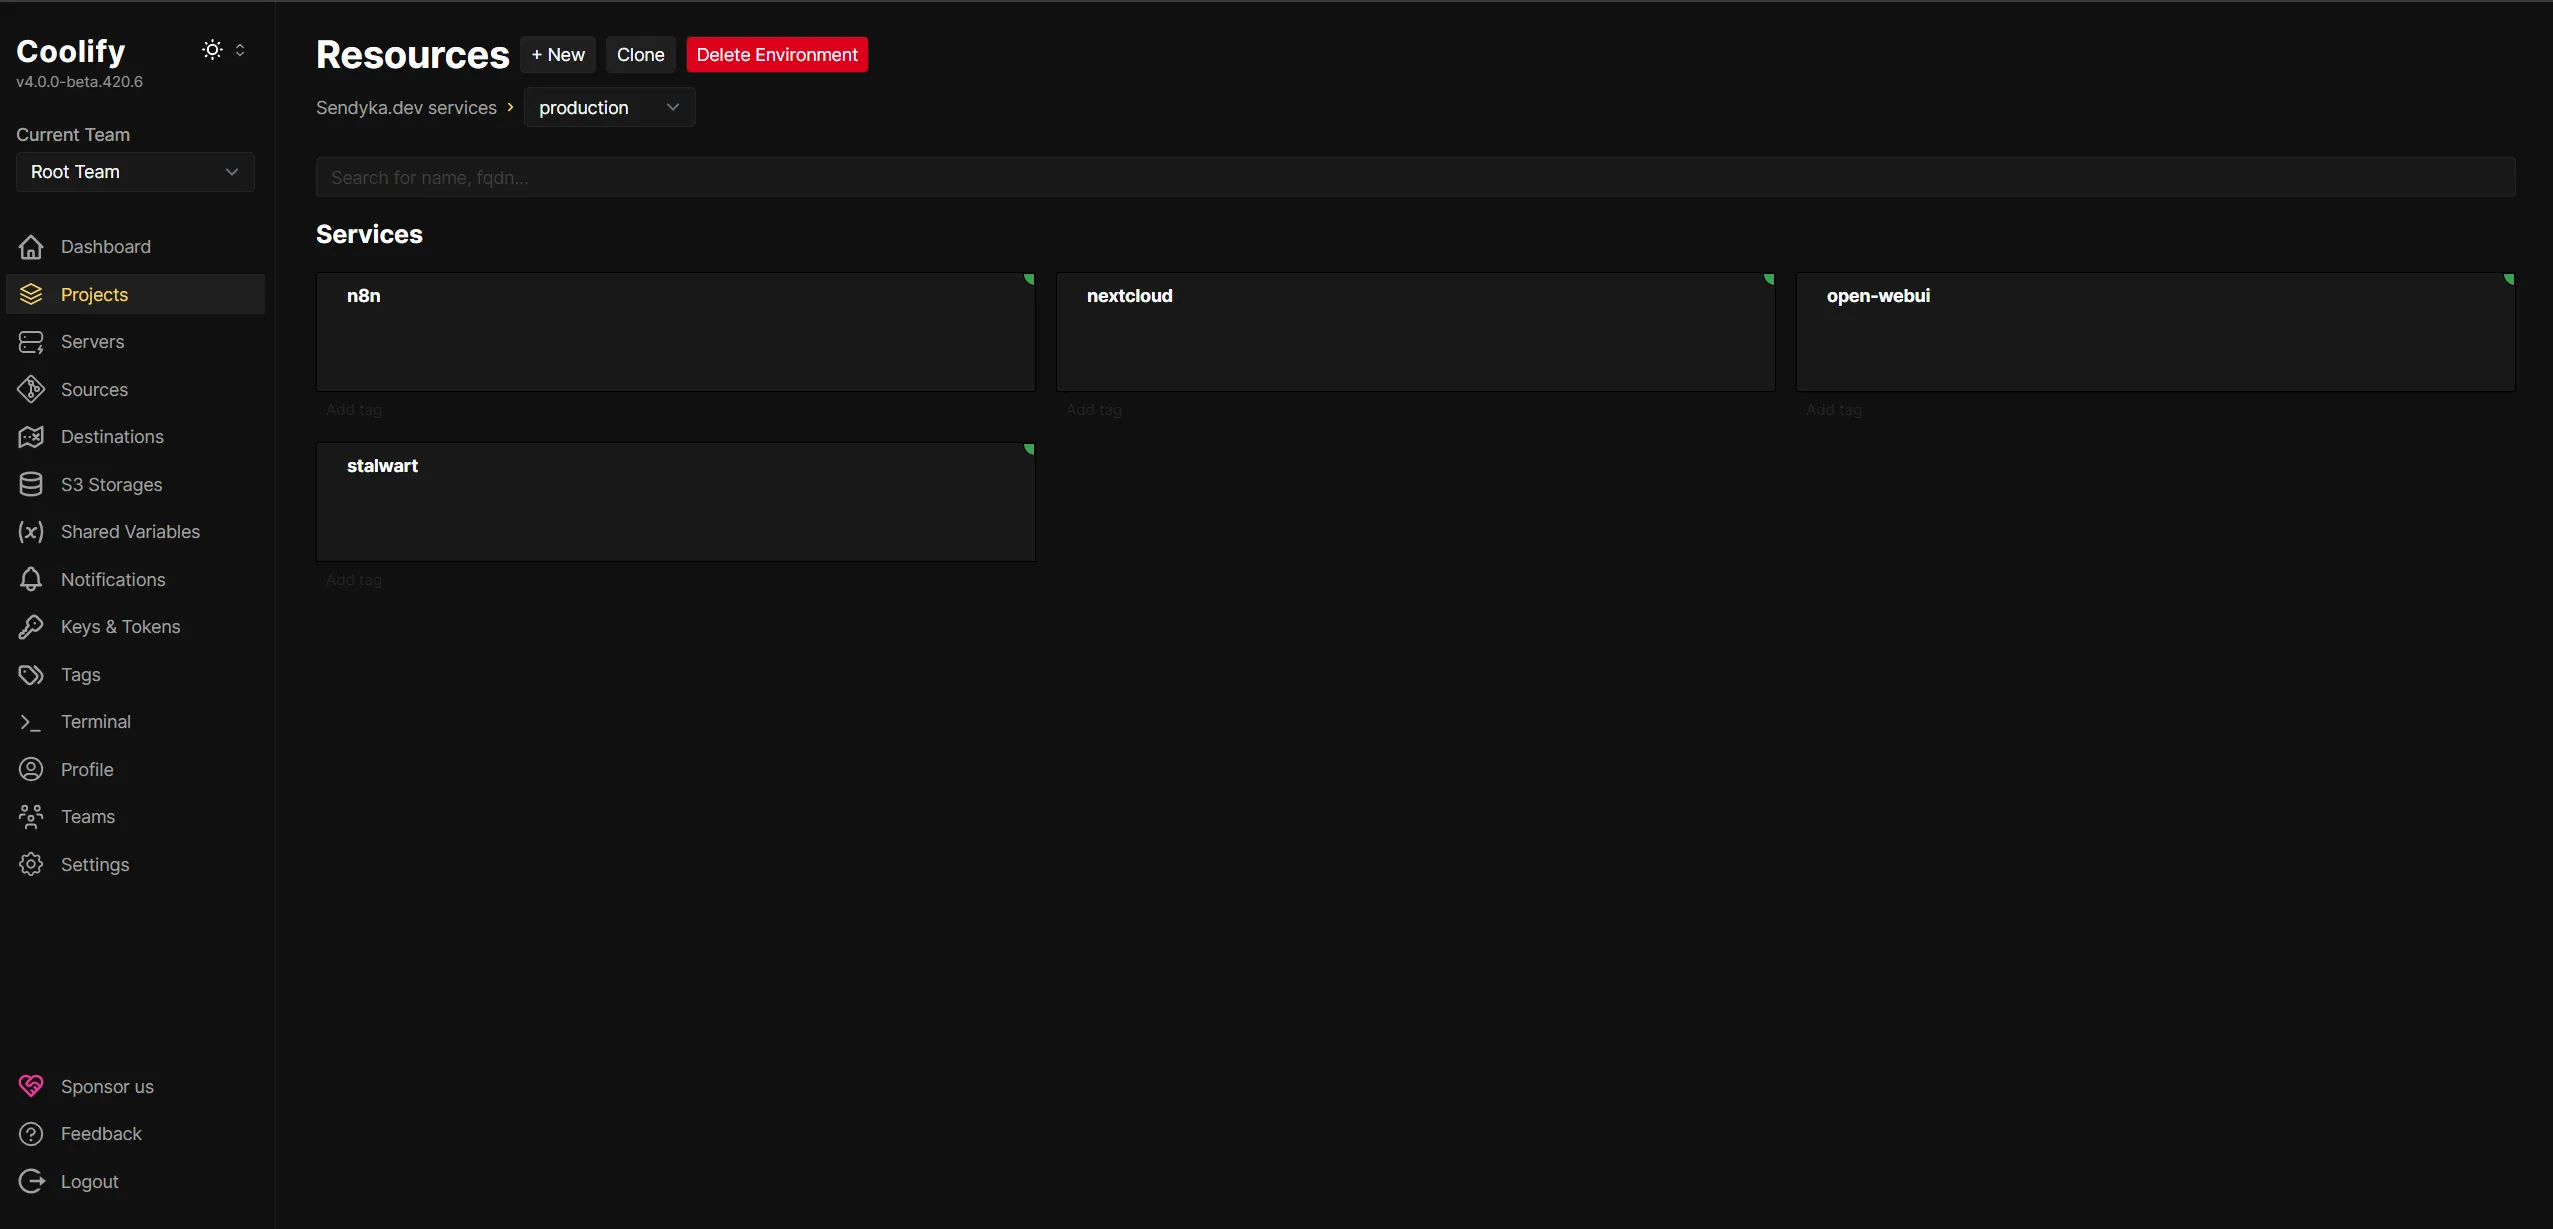
Managing Your Services
Once all services are deployed, you can manage them from the Coolify dashboard:
- Monitor resource usage
- View logs in real-time
- Restart services when needed
- Update containers with a single click
Security Considerations
Firewall Configuration
Ensure your server's firewall allows only necessary ports:
- 80/443 for HTTP/HTTPS
- 25/465/587 for SMTP
- 143/993 for IMAP
Regular Updates
Keep all services updated regularly. Coolify makes this easy with its one-click update feature.
Backups
Set up regular backups of your data volumes. You can use Coolify's built-in backup feature or set up a custom backup solution.
RECOMMENDATION: Use prebuild S3 Storage support in Coolify to automate your DB backup. Many hosting providers at now offers also so cheap Object Storage solutions on their cloud solution with S3 support.
Migrating Your Data
From Google Drive to Nextcloud
- Install the Nextcloud desktop client
- Download your Google Drive data using Google Takeout
- Upload your files to Nextcloud
From Gmail to Stalwart
- Configure your email client to connect to both Gmail and Stalwart
- Move emails from Gmail to Stalwart folders
- Update your email address on your accounts
Conclusion
By following this guide, you've taken a significant step toward digital independence. You now have your own self-hosted alternatives to Google's services, giving you complete control over your data and enhanced privacy.
Remember that self-hosting comes with responsibilities - you'll need to maintain your server, keep software updated, and handle backups. However, the benefits of data ownership and privacy make it well worth the effort.
Additional Resources
Happy self-hosting!